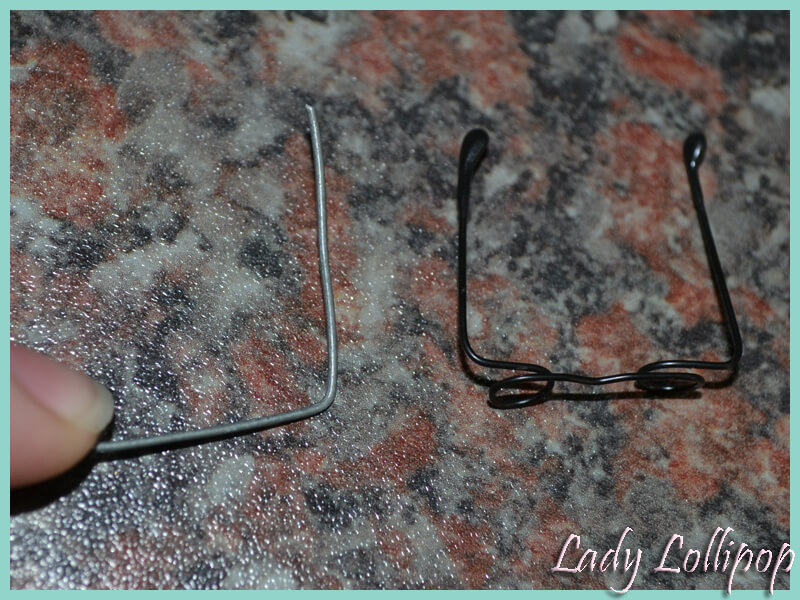
The plastic glasses that come with the modern grandparents seem so silly to me - if it is not bad enough that you struggle to get them on straight, the little elastic bands tend to collapse after some time and then you are left scrambling for a different solution just to keep them on.
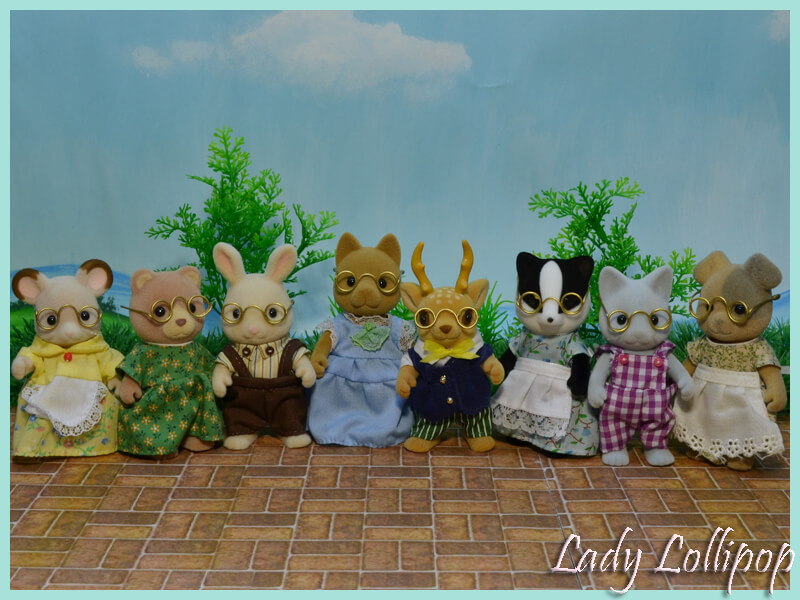
The older Sylvanian Families used to come with bent wire glasses and although they were not ideal in shape and were usually not round at all, they do display better than the plastic ones. So I came up with a solution of my own for all of those grandparents that arrive without their glasses, who dislike their glasses or any figures that may need a bit of help with their eyesight.
Items Needed
Steel wire; 2x Needle nose pliers; Wire cutter; a round pencil/dowel/sturdy tube; Epoxy glue or glue gun; Sanding paper/emery board; Paint/Nail Polish; Something to stick the glasses into while painting; something to cover your work area for painting; Q-tips/small paint brush.
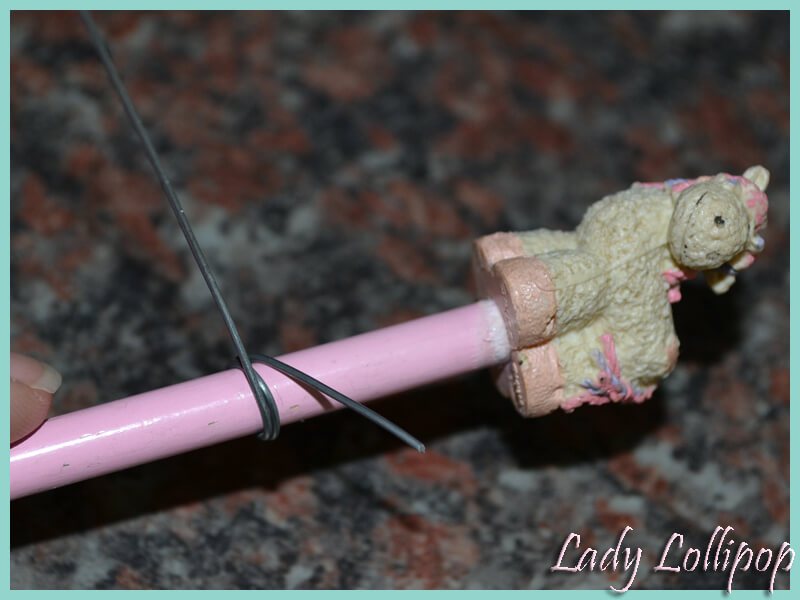
I start off by cutting a length of wire, about 10cm long. Then, using your pliers, measure roughly 2,5cm of wire and bend a 90° angle at the 2,5cm mark. Don't worry if your wire isn't perfectly straight, it will bend as you go and you will straighten it all out before painting anyway.
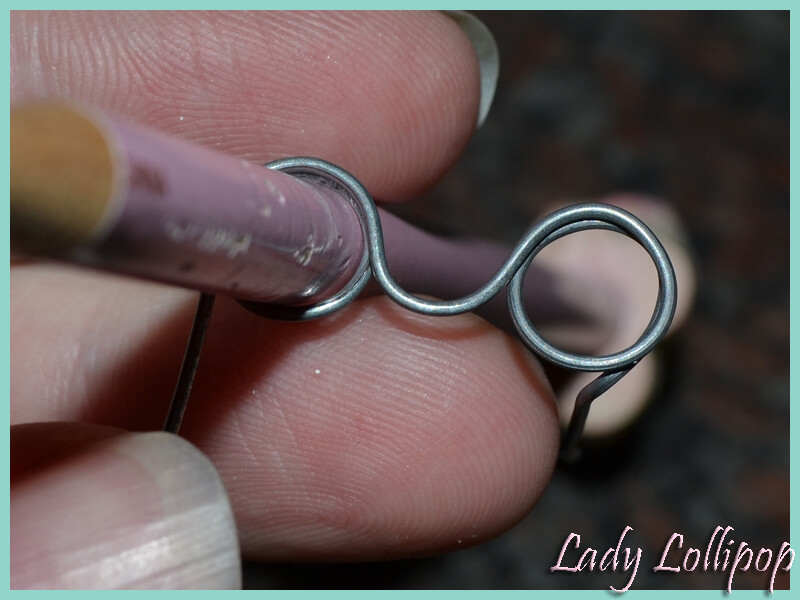
The next part is the tricky bit. You will need to wrap the wire tightly around a round pencil / dowel stick to shape the round "lens" part of your glasses. The 90° bend is likely to bend a little flatter while you are doing this, but just bend it back when you are done. Bend the wire all the way around the pencil one and a half times, so that you are left with a double layer of wire on the one half of your circle and a single wire on the other half. (I usually use the double layered parts for the bottoms of my glasses.)
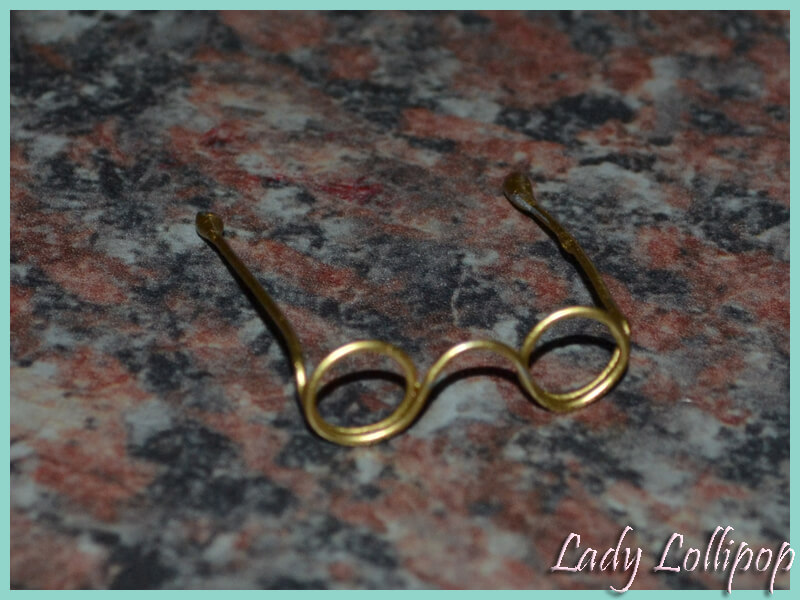
Bend the 2,5cm of wire sticking out, back to form a 90° angle to your wire circle. Now that you have your first "lens", you need to bend the wire to form the nose piece. Because most of the Sylvanian Families critters have quite large, wide noses, I have decided to go with a wide band over the nose to accommodate this. This can easily be adjusted by bending the nose piece closed if you need to later on.
Using your pencil, bend the wire in the opposite direction as if making another circle right next to the first circle. This circle only goes half way around and does not form a full circle.
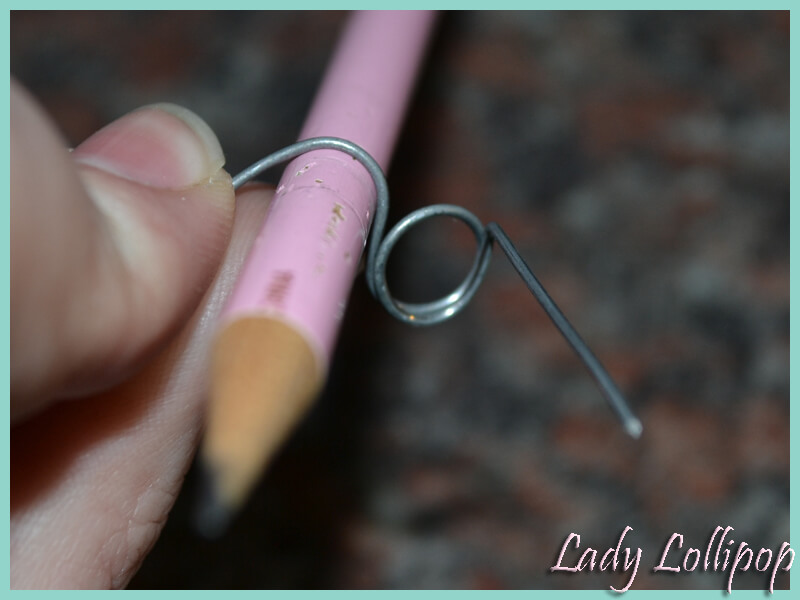
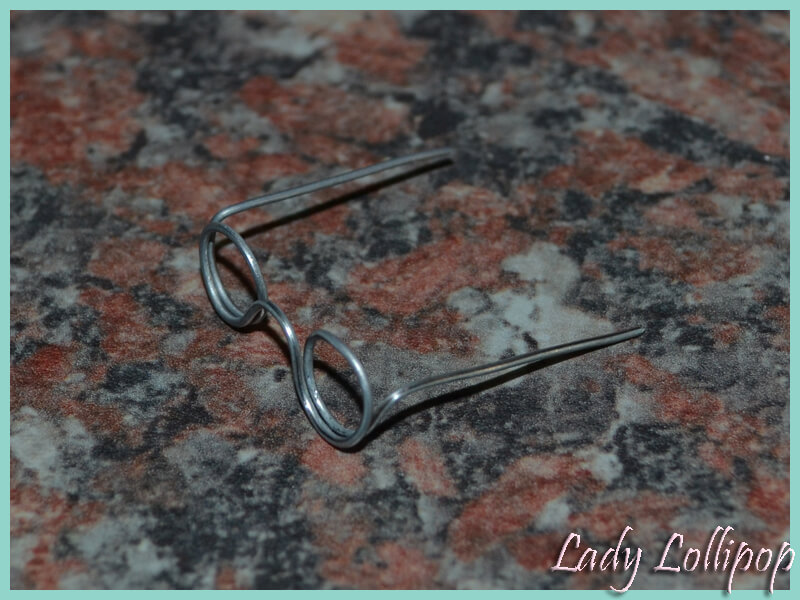
Now you will need to bend a third circle, starting from the end of the half-circle that we just made. Once again you will need to go around the pencil one and a half times, to reach the spot where the earpiece needs to go out from. (Remember to keep the double wire on the bottom, single wire on top!)
Lastly, you will need to bend the earpiece back at a 90° angle, and cut the remainder off at roughly 2,5cm to match the other side. Try to align the earpieces so that they both leave the round circle frames at the same spot on either side of your pair of glasses.
You can leave your glasses like this if you like, but I didn't like the sharp edges on the ends. To fix this, I used epoxy glue found at the hardware store. It has two components that you mix together to form a glue. This glue sets solid in a matter of minutes and sticks to almost anything!
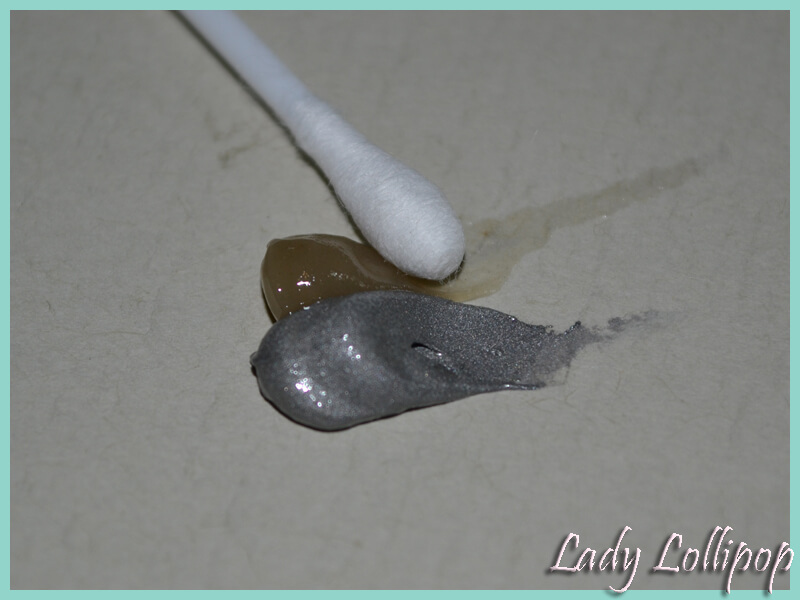
I used Pratley Steel Epoxy on mine, but that was just what I had on hand and does not make much of a difference to the overall outcome. Mix the two glues together according to the manufacturer's instructions and apply them to the ends of your glasses. You will find that the glasses stand up fairly well when placed down on their "lenses". You can also use a glue gun for this part, but I find the hot glue more difficult to work with when things start heating up.
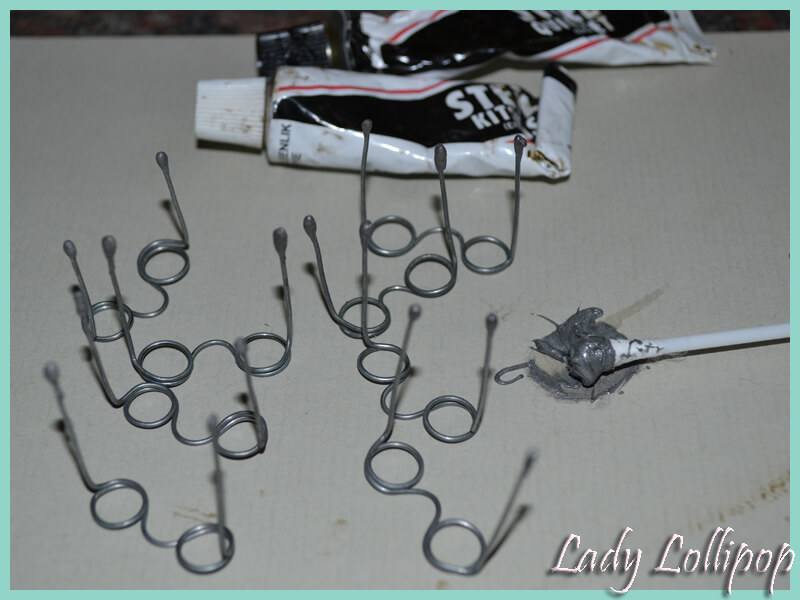
I used a q-tip to smooth the glue out and shape it around the wire, but if using the glue gun, I would do this with my fingers - just keep a bowl of cold water and a towel handy. When the glue is dry, you might want to sand out any rough or sharp edges with an emery board or sanding paper before painting.
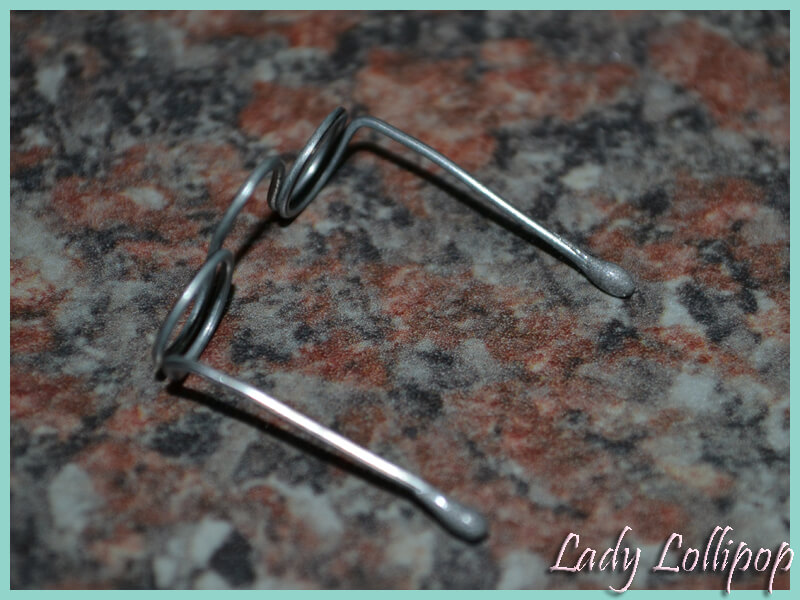
This set of glasses has already been sanded down and is now ready to be painted.
I used an old piece of packaging foam to stand my glasses up while painting them, but blobs of play-doh or Prestik will also work, just as long as you have some way of keeping the painted areas from touching anything while the paint is drying.
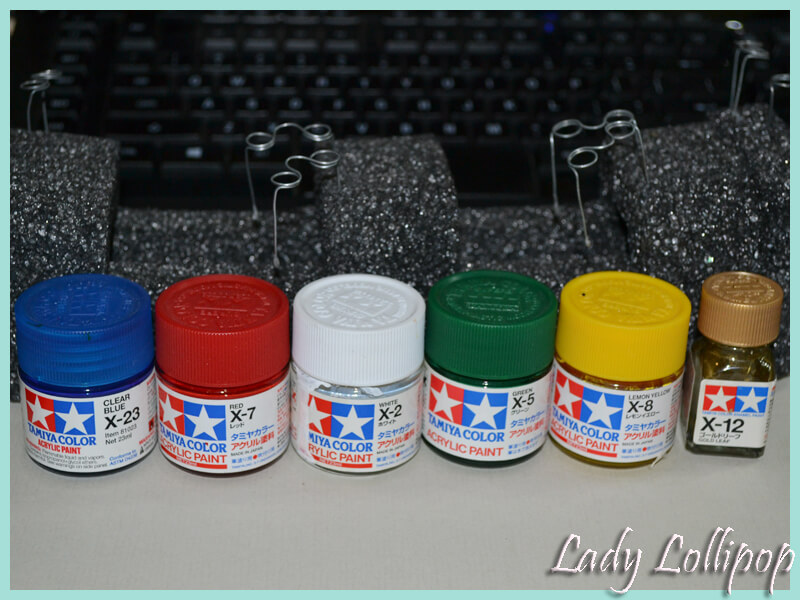
To paint the glasses, I used Tamiya's model paints, mostly because I already had them on hand from my Canal Boat project. Before deciding on the model paints, I also had good results with nail polish, although I needed to use more layers to get a good cover. The nail polish also chipped off easily, exposing the wire underneath and needed to be touched up if you want to handle the glasses.
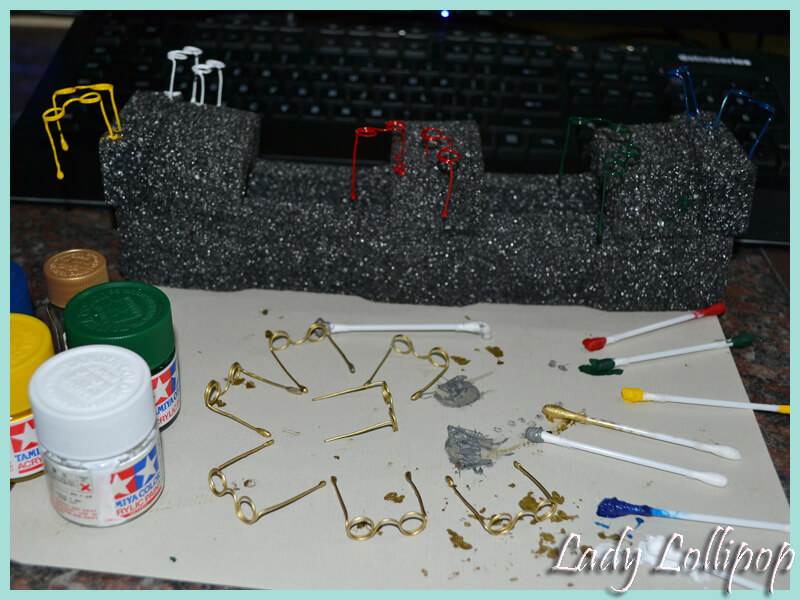
I painted my glasses in two batches, allowing enough drying time between coats so that the paint would harden. I used q-tips to paint with as well, simply because the brushes had some difficulty painting the round wire all the way around. I could press the wire into the q-tip slightly to get a good coating all the way around.
Remeber to remove all paint blobs with a clean q-tip before the paint dries. If you only notice a blob after the paint has dried, you can always sand that part down and re-paint it again.
This method of making glasses works well for most critters and I find that by bending the middle "nose" section of the glasses, I can fit them onto almost any critter's face without much problems. I also later decided to make some of my earpieces slightly longer to fit better on critters with larger heads. (Like the old bear molds etc.)